Gmail Backup Tool
Gmail Backup – Safer is Better
Since data loss may become very costly for an individual or an organization, no one wants to lose his data. If you are anguish about losing your emails in case of any sudden malfunction, a good idea is to create a backup of your Gmail account regularly before anything happens to your emails. Backup of your Gmail data is possible with the help of Gmail Backup Tool that stores your Gmail data into local disk. Further, it can be viewed in desktop email client in case of sudden glitch. The requirements and working of this software is provided below in clear steps:
Technical Specification:
Before using the Gmail Backup Tool, your system must have the following pre-requisites:
|
Processor |
1 GHz |
|
RAM |
512 MB |
|
Supported Platform |
Windows 8.1 and all below versions |
|
Platform Type |
32-bit or 64-bit |
|
Hard Disk Space |
15 MB Free |
|
Version |
4.2 (Latest) |
Software Requirements –
- IMAP must be enabled on Google account.
- 2-step verification of user account must not be enabled.
- Allow less secure apps.
Steps to Perform Gmail Backup:
After installation of the software, the initial screen will look like –

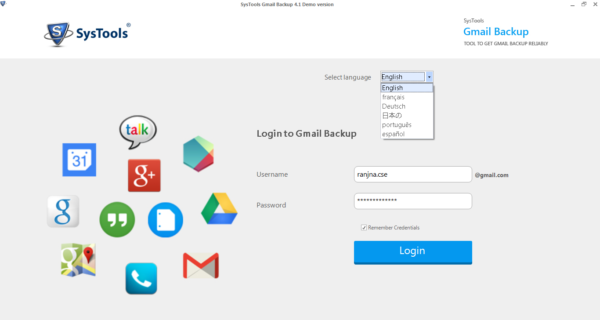
Step 1. Select the language in which you want to continue with the tool.
Provide the login credentials of your Gmail account for which you want to create the backup file.
If you want to remember the credentials, check the box “Remember Credentials”.
Click on Login button.
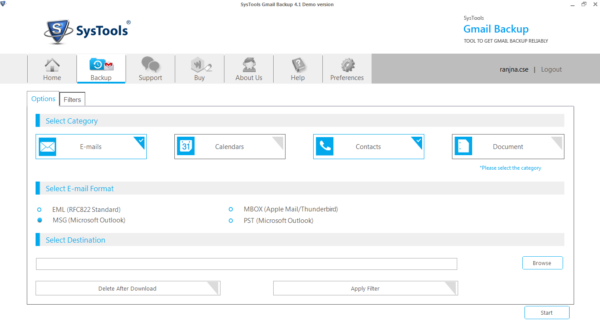
Step 2. You will have 2 tabs (Options & Filters) in the next section. Let us look at the functions of Options tab.
Select the category that you want to backup among Emails, Calendars, Contacts, & Documents.
Select the file format in which you want to back up your email files. The file formats provided by emails are EML, MSG, MBOX, and PST.
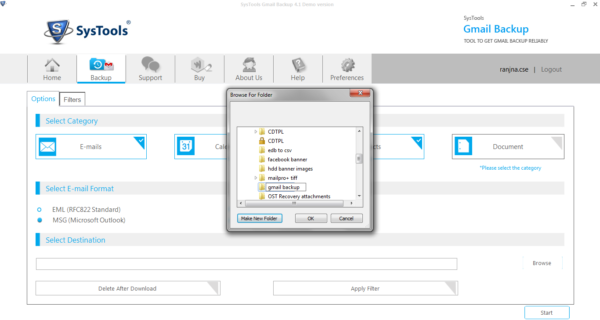
Step 3. Select the destination path where you want to save your backup file in the local disk of your computer by clicking on Browse button. You can also create a new folder to save the backup file.
Step 4. If you want to delete all the email files from Gmail Server after creating a backup of them, click on “Delete After Download” button.
Now a dialogue box will be opened that again requires your conformation. If you really want to delete the data from server then click on Yes tab. Otherwise, continue the process by clicking the No option.

Step 5. Click on the Apply Filter option to apply the filters for creating the backup. After clicking, you will be moved on the Filters tab automatically.
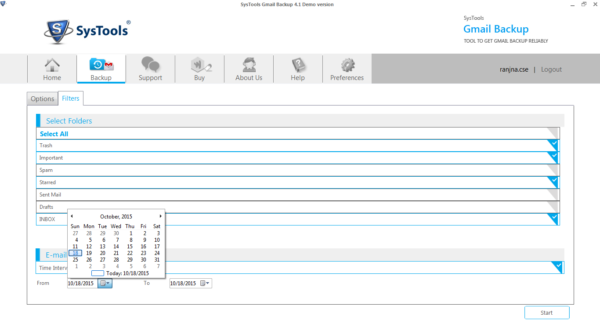
Step 6. Under the Select Folder section, the software automatically lists all the folders visible in your Gmail account. You can select the desired folders for backup process or can select all the folders by clicking on the Select All option.
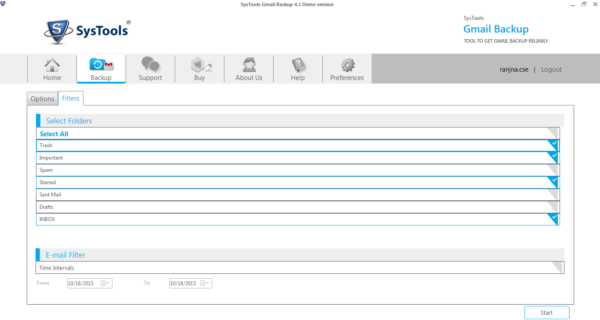
Step 7. You have an option to back up the emails under the specified time limit. You can enable this option by clicking the Time Intervals option under the Email Filter section.
Select the date by clicking the dropdown menu given besides From and To sections. This will help you to create the backup file for the emails within the specified date range only.
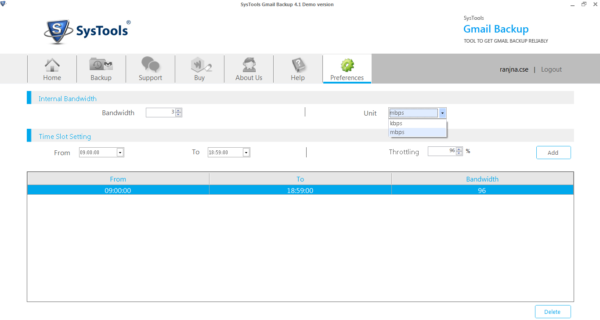
Step 8. Click on the Preferences tab if you wish to set the internet bandwidth that is used by the software during the whole backup process. Now provide the Bandwidth and Unit (kbps or mbps) and select the Time Slot Setting using dropdown menu to specify the time limit. Set the Throttling percentage and click on Add button. In a similar way, you can add multiple slots with required internet throttling or delete any of the specified time slots by selecting that time slot and clicking on Delete button provided below.
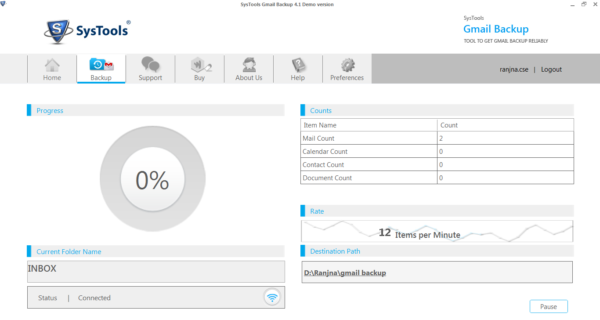
Step 9. Click the Start button in order to start the backup process. Now you will see the details of the process such as a percentage wheel that show the percentage of completion of the backup process.
In the table Counts, the number of converted items and its name such as Mail Count, Calendar Count, Contact Count, and Document Count is displayed.
The window also contains the destination path in a separate tab.
Meanwhile, you can stop the backup process any time as per your convenience by clicking on Stop button.
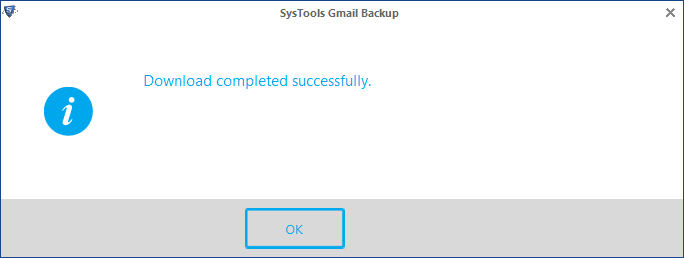
Step 10. After the completion of download process, a pop-up window opens and displays “Download completed successfully”. Click on OK tab.
Conclusion:
Gmail Backup Tool is an efficient tool to create a backup file of Gmail data. It contains some minor issues that are completely negligible. Since it does not compromise with your security level so can be chosen without any tension of leakage of your confidential and prominent data. The generated output file contains the exact data in the predefined format that simplify the usage of that emails in simple way. The added facility provided by this tool is to manage the internet speed.
I found this tool very helpful and easy to use if you want to create an instant backup of your Gmail data. I can rate this product as 9.4/10
Author’s Bio
Donna Adee is a Master degree holder in Computer Science 6 years ago and presently working as Senior Software Engineer in Microsoft since last 5 years. She also contributes in writing blogs and articles, and written many articles on different software that are currently in trend. Her articles were appeared in many IT magazines available worldwide.